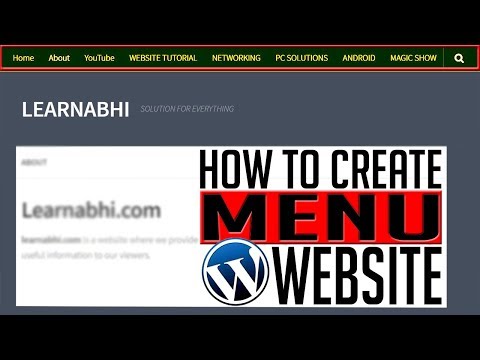
WORDPRESS MENU TUTORIAL

Guys, creating a website and writing post its an easy and simple task. But, multiple menus in your website makes it look better and give viewers the opportunity to watch the content according to their requirement. In most of the websites you might have noticed that there is a Menu called “About”, and they use to write the information about their website or blog. Even, there are some menus which is linked to their Facebook or YouTube page. In this post, I am going to share you all this staff in easy and simple manner. So, what are the best method to create menus, lets find out.
HOW TO CREATE CUSTOM MENU IN WORDPRESS WEBSITE
Guys for creating custom menu there are multiple option in wordpress. Even, you can also add custom menu from plugins. But, In this post, I will show you how to add custom menu without the help of any plugin and also I will show you on how to add post into it. There are three easy steps:
- Create a Category
- Add a Menu
- Add Post into categories
Here is a video on WordPress Menu Tutorial it makes you understand better:
How to create a category in wordpress
- Login to your wordpress dashboard
- Go to Post and click on Categories
- You will see the option to Add a New Category in the left hand side of your screen.
- Write the name of your category (E.g. TECH NEWS), write the name of your menu in SLUG and write few words about your menu in the description.
- Click on Add New Category
How to add custom Menu in WordPress
For creating custom menu, you have to go to Appearance and Menus
In the bottom left corner, you will find four different option:
- Pages
- Posts
- Custom Links
- Categories
You can create Menu using any of these option.
- If you want to add a page into your menu (i.e. page about your website), then select the first option Page.
- You can link any of your post into Menu by selecting the second option Posts.
- You can also link any of your Facebook page or YouTube channel, etc into a menu by selecting custom links.
- The last and the final option is Categories, This is the most important and useful option to create a menu. Select the forth option Categories to add category into menu. As for example, you want to create a menu on TECH NEWS then select the category TECH NEWS.
- At the bottom, you will find option to select your menu location. So, select the display location topbar and click on Save Menu.
- Now, you can check your website. You must see there is new menu created by the name TECH NEWS.
HOW TO ADD POST INTO MENU
Write a post and select the categories available in the right hand side of your screen. For example, You have written a post and added it into the category TECH NEWS. Now, once you visit your website, the post will be available under TECH NEWS menu. Add multiple post into the same category and all post will be available under the same menu.
Hope, this post helped you to understand the concept of adding menus in wordpress website. How you feel reading this post on WordPress Menu Tutorial, please let us know in the comment section below. If you have any queries then feel free to ask. I would love tho help you.
Here, is a video on ranking your website in google search engine.

WEBSITE MAKING TUTORIAL FOR BEGINEERS:
SUBSCRIBE out YouTube channel TECHNICAL TECH and watch more tutorial about website making, technologies, gadget reviews, etc.